Posts

[Hindi / Urdu] Arduino Tutorial Buzzer with LDR and LED

Image
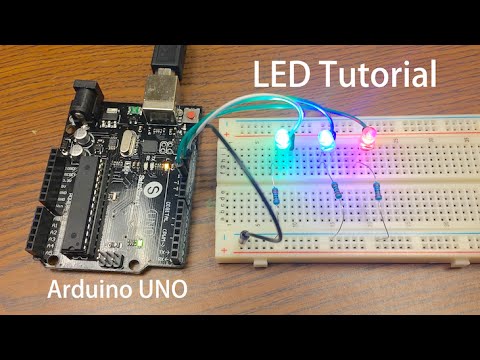
Arduino basic tutorial for beginner. We will learn use buzzer, ldr and led with Arduino Uno. Hardware Required: - Arduino Uno - Buzzer - LED - LDR - 220 and 10K ohm resistor - Wires - Breadboard Get the Code:   //set pin numbers const int ledPin = 13; const int buzzerPin = 12; const int ldrPin = A0; void setup () { Serial.begin(9600); pinMode(ledPin, OUTPUT); pinMode(buzzerPin, OUTPUT); pinMode(ldrPin, INPUT); } void loop() { int ldrStatus = analogRead(ldrPin); //read the state of the LDR value if (ldrStatus >= 400) { tone(buzzerPin, 100); digitalWrite(ledPin, HIGH); delay(100); noTone(buzzerPin); digitalWrite(ledPin, LOW); delay(100); Serial.println("----------- ALARM ACTIVATED -----------"); } else { noTone(buzzerPin); digitalWrite(ledPin, LOW); Serial.println("ALARM DEACTIVATED"); } }

[Hindi/Urdu] Arduino Tutorial Sound Sensor (with LED)

Image
Descriptions: Sound sensors can be used for a variety of things, one of them could be turning lights off and on by clapping. Today however we are going to use hook up the sound sensor to an array of LED lights which will beat with music, clapping or knocking. Hardware Required: - Arduino Board -  https://goo.gl/g9sLdP - Sound Sensor -  https://goo.gl/Kki4UM - LED - 220 ohm Resistors - Mini Breadboard -  https://goo.gl/Bmqz5q - Wires Recommended site to buy the required hardware: Connections : Arduino Sound Detection Sensor This module allows you to detect when sound has exceeded a set point you select.Sound is detected via a microphone and fed into an LM393 op amp. The sound level set point is adjusted via an on board potentiometer. When the sound level exceeds the set point, an LED on the module is illuminated and the output is sent low. Get the Code:   int soundSensor = 2; int LED = 3; void setup() { pinMode (soundSensor, INPUT); pinMode (LED, OUTPUT);

[Hindi / Urdu] ArduinoTutorial LCD Control via Bluetooth

Image
How to control an LCD via Bluetooth First watch this video: https://www.youtube.com/watch?v=Q1SsHXHoOpU Hardware Required - Arduino or Genuino Board - LCD Screen - HC06-05 Bluetooth Module - Pin headers to solder to the LCD display pins - 10k ohm potentiometer - 220 ohm resistor - hook-up wires - breadboard Recommended site to buy the required hardware: https://goo.gl/HZk1mS The LCDs have a parallel interface, meaning that the microcontroller has to manipulate several interface pins at once to control the display. The interface consists of the following pins: - A register select (RS) pin that controls where in the LCD's memory you're writing data to. You can select either the data register, which holds what goes on the screen, or an instruction register, which is where the LCD's controller looks for instructions on what to do next. - A Read/Write (R/W) pin that selects reading mode or writing mode - An Enable pin that enables writing to the regist

[Hindi / Urdu] Arduino Tutorial LCD Display Control

Image
The LCDs have a parallel interface, meaning that the microcontroller has to manipulate several interface pins at once to control the display. The interface consists of the following pins: - A register select (RS) pin that controls where in the LCD's memory you're writing data to. You can select either the data register, which holds what goes on the screen, or an instruction register, which is where the LCD's controller looks for instructions on what to do next. - A Read/Write (R/W) pin that selects reading mode or writing mode - An Enable pin that enables writing to the registers - 8 data pins (D0 -D7). The states of these pins (high or low) are the bits that you're writing to a register when you write, or the values you're reading when you read. - There's also a display constrast pin (Vo), power supply pins (+5V and Gnd) and LED Backlight (Bklt+ and BKlt-) pins that you can use to power the LCD, control the display contrast, and turn on and off the LED

[Hindi / Urdu] Arduino Project Obstacle Avoiding Robot

Image
This Tutorial is for anyone getting started with arduino. We will be building an obstacle avoiding robot that uses an ultrasonic HC SR-04 sensor to detect objects. Hardware Required * Arduino Board * Adafruit Motor Shield * HC-SR04 Ultrasonic Module Distance Sensor for Arduino * Tower Pro SG90 RC Mini Servo Motor * Bracket / Holder for HC-SR04 * DC Motors and Wheels * Bovine Wheel * Plate or something like that * Wires * Battery Buckle 9V * Battery 9V * Glue Gun or Cable Ties Install AFMotor.h library; https://learn.adafruit.com/adafruit-motor-shield/library-install Download and install NewPing.h library https://bitbucket.org/teckel12/arduino-new-ping/downloads How to use NewPing; http://playground.arduino.cc/Code/NewPing How to install library; https://www.arduino.cc/en/Guide/Libraries Get the Code: #include <AFMotor.h> #include <Servo.h> #include <NewPing.h> #define TRIG_PIN A4 #define ECHO_PIN A5 #define

[Hindi / Urdu] LED Sequential Control Simple Arduino Project

Image
Today I am going to show you guys a very simple arduino project for beginners. We’re going to get three different LEDs to turn on and turn off in a simple sequence, like you see here. For this, you’re going to need an Arduino Uno or similar Arduino board, a breadboard (preferably with a positive and negative rail like this one), four breadboard jumper wires, a USB cable to for the Uno, three LEDs of different colors(here we are using Blue, Red and Green) and 3 220ohm resistors. Now we’re using 220ohm resistors, because they seem to work best with the LEDs we have- but you could use different resistors, depending on your LEDs and your circuit. I’ve put a link to an inexpensive arduino kit that contains all these components in the description below, in case you’re looking to get an arduino uno and all the basic components for this tutorial.  --------------------------------------------------------------------------------------------------------------------- Arduino Kit